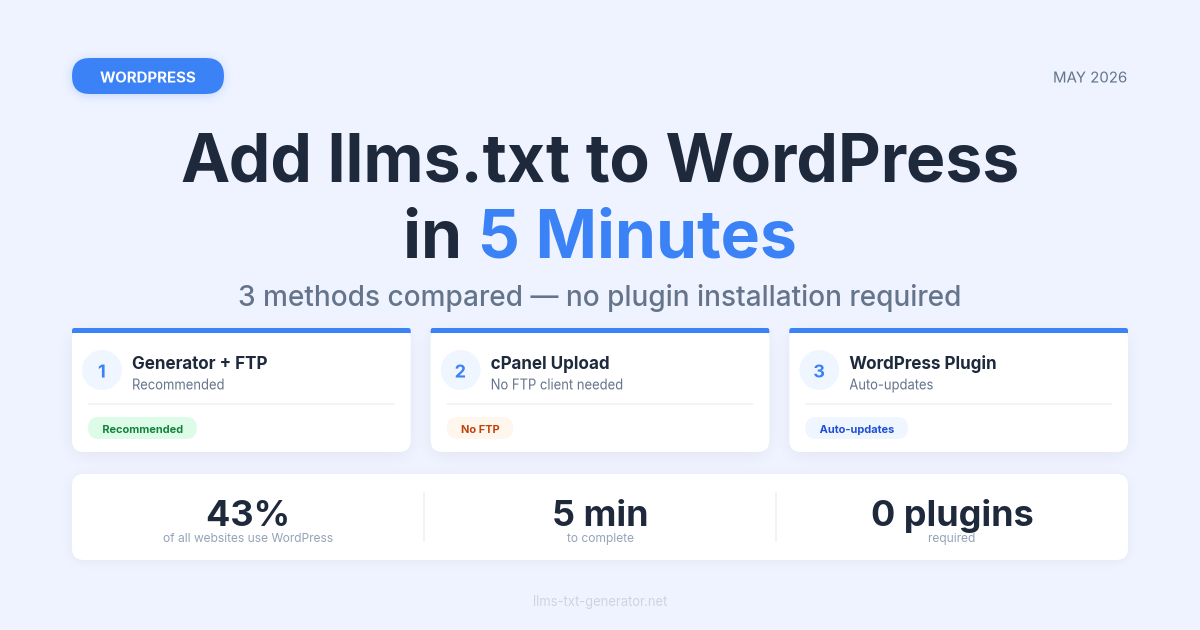
WordPress powers more than 43% of all websites on the internet. If yours is one of them, you've probably heard about llms.txt recently — the standard that helps AI models like ChatGPT, Claude, and Perplexity understand your content and cite it accurately.
If you've searched for how to add llms.txt to WordPress, you've likely hit the same wall: every guide either wants you to install another plugin, or assumes you already know how FTP works. This guide skips both assumptions.
We'll walk through three concrete methods — starting with the fastest, which takes under 5 minutes and requires no plugin installation. By the end, your WordPress site will serve a properly structured llms.txt file at yourdomain.com/llms.txt, readable by AI crawlers from ChatGPT, Claude, and Perplexity.
What Is llms.txt and Why Does It Matter for WordPress Sites?
An llms.txt file is a short Markdown document at your site root that tells large language models what your site is about and which pages to prioritize. Unlike robots.txt (which restricts access) and sitemap.xml (which lists every URL), llms.txt is written specifically for AI comprehension — clean, structured, no HTML boilerplate.
For WordPress specifically, this matters more than you might think. A typical WordPress page is loaded with navigation menus, widget sidebars, footer sections, and plugin-injected scripts. When an AI crawler hits your pages, it has to parse all of that noise to find the few hundred words of actual content you wrote. A well-structured llms.txt cuts through that noise and points AI directly to what matters.
For a deeper look at the standard itself, see our complete guide to llms.txt and why your website needs one. Here we'll stay focused on WordPress implementation.
The Three Methods at a Glance
Before going step-by-step, here's a quick comparison. Choose the method that fits your skill level and hosting setup.
Method | Time Required | Technical Skill | Auto-Updates? | Best For |
|---|---|---|---|---|
Method 1: Generator + FTP | ~5 min | Low | No (manual) | Developers, stable sites |
Method 2: Generator + cPanel | ~5 min | Very low | No (manual) | Non-technical users |
Method 3: WordPress Plugin | ~10 min | Very low | Yes (automatic) | Frequently updated sites |
Methods 1 and 2 are recommended for most sites. They add zero plugin dependencies and give you full control over the file content. Method 3 makes sense if you publish new content frequently and want your llms.txt to update automatically when posts go live.
Step 0: Generate Your llms.txt File (All Methods Start Here)
All three methods start the same way — you need the actual llms.txt file before you can upload anything. You could write it by hand in a text editor, but the faster path is to generate your free llms.txt file in about 60 seconds.
Go to the generator and enter your WordPress site's URL.
The tool crawls your site and identifies your key pages — home, about, services, top posts, and more.
Review the generated output. You can edit any section directly before downloading.
Click download to save the file as
llms.txt.
The generated file will follow the correct format: an H1 title, a blockquote site description, and organized H2 sections with links to your most important pages. You can always open it in any text editor and adjust it before uploading.
Method 1: Upload via FTP (Recommended for Developers)
FTP (File Transfer Protocol) sounds intimidating, but with a free client like FileZilla the process takes about 3 minutes once you have your credentials ready.
What You'll Need
Your
llms.txtfile (generated above)FileZilla (free — filezilla-project.org)
Your host's FTP credentials — find these in cPanel or your host's control panel under "FTP Accounts." Typically: host, username, password, and port
21.
Upload Steps
Open FileZilla. Enter your host, FTP username, password, and port. Click Quickconnect.
In the right panel (remote site), navigate to your WordPress root directory. This is the folder that contains
wp-config.php,wp-content/, andwp-admin/. On most shared hosts it ispublic_html/. On some setups it iswww/or a folder named after your domain.In the left panel (local site), navigate to the folder where your downloaded
llms.txtfile is saved.Drag
llms.txtfrom the left panel to the right panel. The transfer completes in under a second — the file is tiny.Verify: open a browser and visit
https://yourdomain.com/llms.txt. You should see the plain Markdown text.
Common mistake: uploading to the wrong directory. Make sure llms.txt sits at the same level as wp-config.php — not inside wp-content/ or any subdirectory. AI crawlers look specifically for yourdomain.com/llms.txt.
Method 2: Upload via cPanel File Manager
If your host uses cPanel (most shared hosts do), this method requires no FTP client. Everything happens in your browser.
Log in to cPanel. The URL is usually
yourdomain.com/cpanelor your host's direct login page.Find File Manager in the Files section and open it.
Navigate to
public_html/— or wherever your WordPress root is. Same rule as Method 1: look for the folder containingwp-config.php.Click Upload in the top toolbar.
Select your
llms.txtfile and upload it.Verify: visit
https://yourdomain.com/llms.txtin your browser.
If you see a 404 error, double-check the directory — you likely uploaded to the wrong folder. If you get a download prompt instead of seeing the text, your server is sending the wrong Content-Type header. Fix it by adding one line to your .htaccess file: AddType text/plain .txt
Method 3: WordPress Plugin (For Frequently Updated Sites)
If you publish new posts or update pages frequently, a plugin makes sense — it can regenerate your llms.txt automatically whenever content changes, so you don't need to re-upload manually.
Recommended Plugins
Yoast SEO — If you already use Yoast, it has built-in
llms.txtgeneration. Enable it under SEO → Settings → Advanced. Zero extra plugin overhead.AIOSEO (All in One SEO) — Similar built-in feature. If you're already on AIOSEO, check the AI settings panel.
Website LLMs.txt (standalone plugin) — Specifically built for
llms.txt. Gives you control over which post types to include.
Honest Trade-offs
Plugins add dependency and maintenance overhead. Before choosing Method 3, consider:
If you already use Yoast or AIOSEO — enable their built-in feature. You get auto-updates with zero extra plugin weight.
If your site is relatively stable (you publish fewer than 4 new posts per month) — Methods 1 or 2 are simpler. Set a monthly reminder to regenerate and re-upload.
If you use a standalone plugin — review the auto-generated output periodically. Plugins may include tag pages, author archives, or thin content that shouldn't be in your
llms.txt.
What to Include in Your WordPress llms.txt
Regardless of which method you use, the content of your llms.txt matters. A file that lists every single WordPress post isn't useful — AI crawlers benefit from a curated map, not an exhaustive one. Think of it as your site's highlight reel, not its full archive.
Include These
Core pages: Home, About, Services/Products, Contact
Top blog posts: Your 10–20 best posts — highest-quality, most representative of your expertise
Key resources: Documentation, pricing pages, case studies, landing pages
Brief descriptions for each link — one sentence explaining what the page covers
Leave These Out
Tag pages, category archives, date archives
Author profile pages
Admin, login, or dashboard URLs (
/wp-admin)Low-quality, thin, or duplicate posts
Paginated versions of the same content (
/?page=2)
The goal is to give AI models a clean signal. A file with 30 well-chosen entries is more useful than one with 300 pages — and less likely to be skipped by crawlers that have token limits.
Verifying Your llms.txt Is Working
Once uploaded, confirm it's live and accessible in three ways:
Browser check: Visit
https://yourdomain.com/llms.txt. You should see the plain Markdown text — not a 404, not a browser download prompt.Manual AI test: Open Perplexity or Claude and ask: "Visit [yourdomain.com/llms.txt] and summarize what this site is about." If it responds accurately, the file is being read.
HTTP status check: Use a tool like httpstatus.io to confirm the URL returns a 200 OK with
Content-Type: text/plain.
Conclusion
Adding llms.txt to WordPress takes under 5 minutes and requires no plugin for most sites. Generate the file, upload it to your WordPress root directory alongside wp-config.php, and verify it loads at /llms.txt. Done.
The fastest path for non-technical users: generate your free llms.txt file, download it, and use cPanel File Manager to upload it to public_html/. Most site owners finish in under 5 minutes with no FTP client needed.
If you already use Yoast or AIOSEO and update your content frequently, enable their built-in llms.txt feature — it handles updates automatically with no additional plugin overhead.
Frequently Asked Questions
Does adding llms.txt to WordPress require developer skills?
No. Method 2 (cPanel File Manager) requires no developer skills — just access to your hosting control panel and a downloaded llms.txt file. The upload process takes about 3 minutes and involves no code or command-line work.
Will llms.txt affect my WordPress site's page speed or regular SEO rankings?
llms.txt is a small static text file (typically under 10KB). It has no effect on page load speed, no impact on how Googlebot crawls your existing pages, and no effect on your current search rankings. It is purely additive — it doesn't modify any existing WordPress files.
How often should I update my WordPress llms.txt file?
For most sites, updating it monthly or whenever you publish significant new content is sufficient. If you're using a plugin (Method 3), it may update automatically. If you uploaded manually, a monthly reminder to regenerate and re-upload is a reasonable maintenance schedule.
Does this work on WordPress.com, or only self-hosted WordPress?
The FTP and cPanel methods only work on self-hosted WordPress (WordPress.org). WordPress.com (the hosted service) does not give you direct file-system access. On WordPress.com, you'd need to use an officially supported plugin or wait for WordPress.com to add native llms.txt support — which has not happened as of May 2026.
Where exactly does the llms.txt file go in WordPress directory structure?
It goes in the WordPress root directory — the same folder containing wp-config.php, wp-includes/, wp-admin/, and wp-content/. On most shared hosts this is public_html/. Do not place it inside any subdirectory — the file must be accessible at yourdomain.com/llms.txt, not yourdomain.com/wp-content/llms.txt.
How large should my WordPress llms.txt file be?
There is no official size limit, but keep it under 100KB as a practical guideline. Most sites find that a curated list of 20–50 entries runs well under 20KB. If your file is growing large, that is a sign you're including too much — focus on your most important 10–30 pages and posts.
Does Google read llms.txt files from WordPress sites?
As of 2026, Google does not officially support llms.txt. In July 2025, Google's Gary Illyes compared it to the discredited keywords meta tag. However, ChatGPT (GPTBot), Claude (ClaudeBot), and Perplexity (PerplexityBot) do actively crawl llms.txt files. For AI-driven search — which is growing — the file is already useful independent of Google's position.
Which AI models will actually read my WordPress llms.txt?
The AI crawlers that actively reference llms.txt include GPTBot (OpenAI), ClaudeBot (Anthropic), and PerplexityBot (Perplexity AI) — the three crawlers behind the major AI search and assistant products. Bing's extended AI crawler has also shown interest. Together they represent hundreds of millions of active AI assistant users who may encounter and cite your content.
Can I add llms.txt to a WordPress Multisite installation?
Yes, with a nuance. In a WordPress Multisite network, each subsite typically lives under a subdirectory (yourdomain.com/site1/) or subdomain. You should place a llms.txt at the network root for the main domain, and optionally a separate one at each subsite root if those sites have significantly different content.
What happens if my llms.txt file has formatting errors?
AI crawlers are generally tolerant of minor Markdown formatting issues — they'll parse what they can. However, a malformed file (broken links, missing headings) may cause crawlers to miss sections. The simplest validation: paste your file into any Markdown renderer and check that all sections and links display correctly before uploading.